Repairing a ruined moped crankshaft with a welder and an angle grinder.
My little bro was enjoying his new-ish moped that we got running recently and, while riding around with his friends, had it break down in the worst way.
He called me up and told me that some nut on some shaft came off and won't go back on again. I told him that perhaps it's a reverse thread, yet it won't go on either way. Okay so we got a video call going on and through the few pixels that I saw I could tell that this is not an easy fix my brother could do by himself.
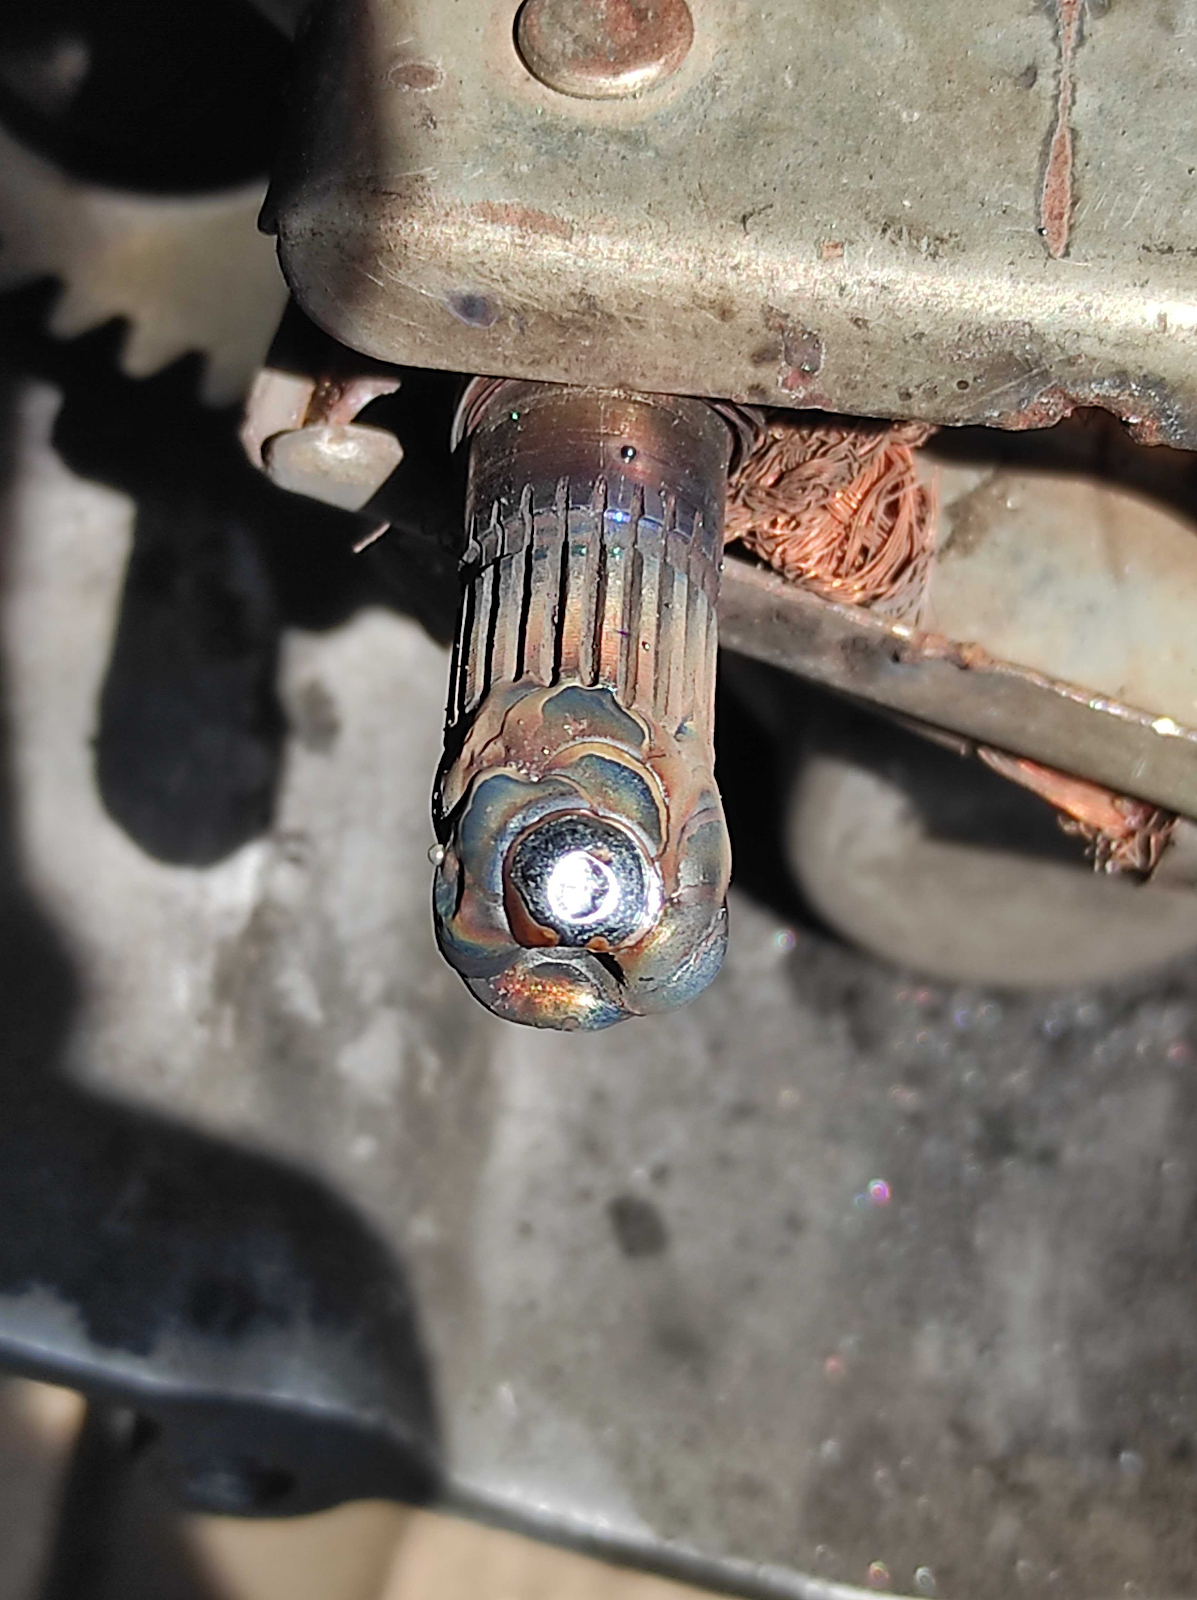
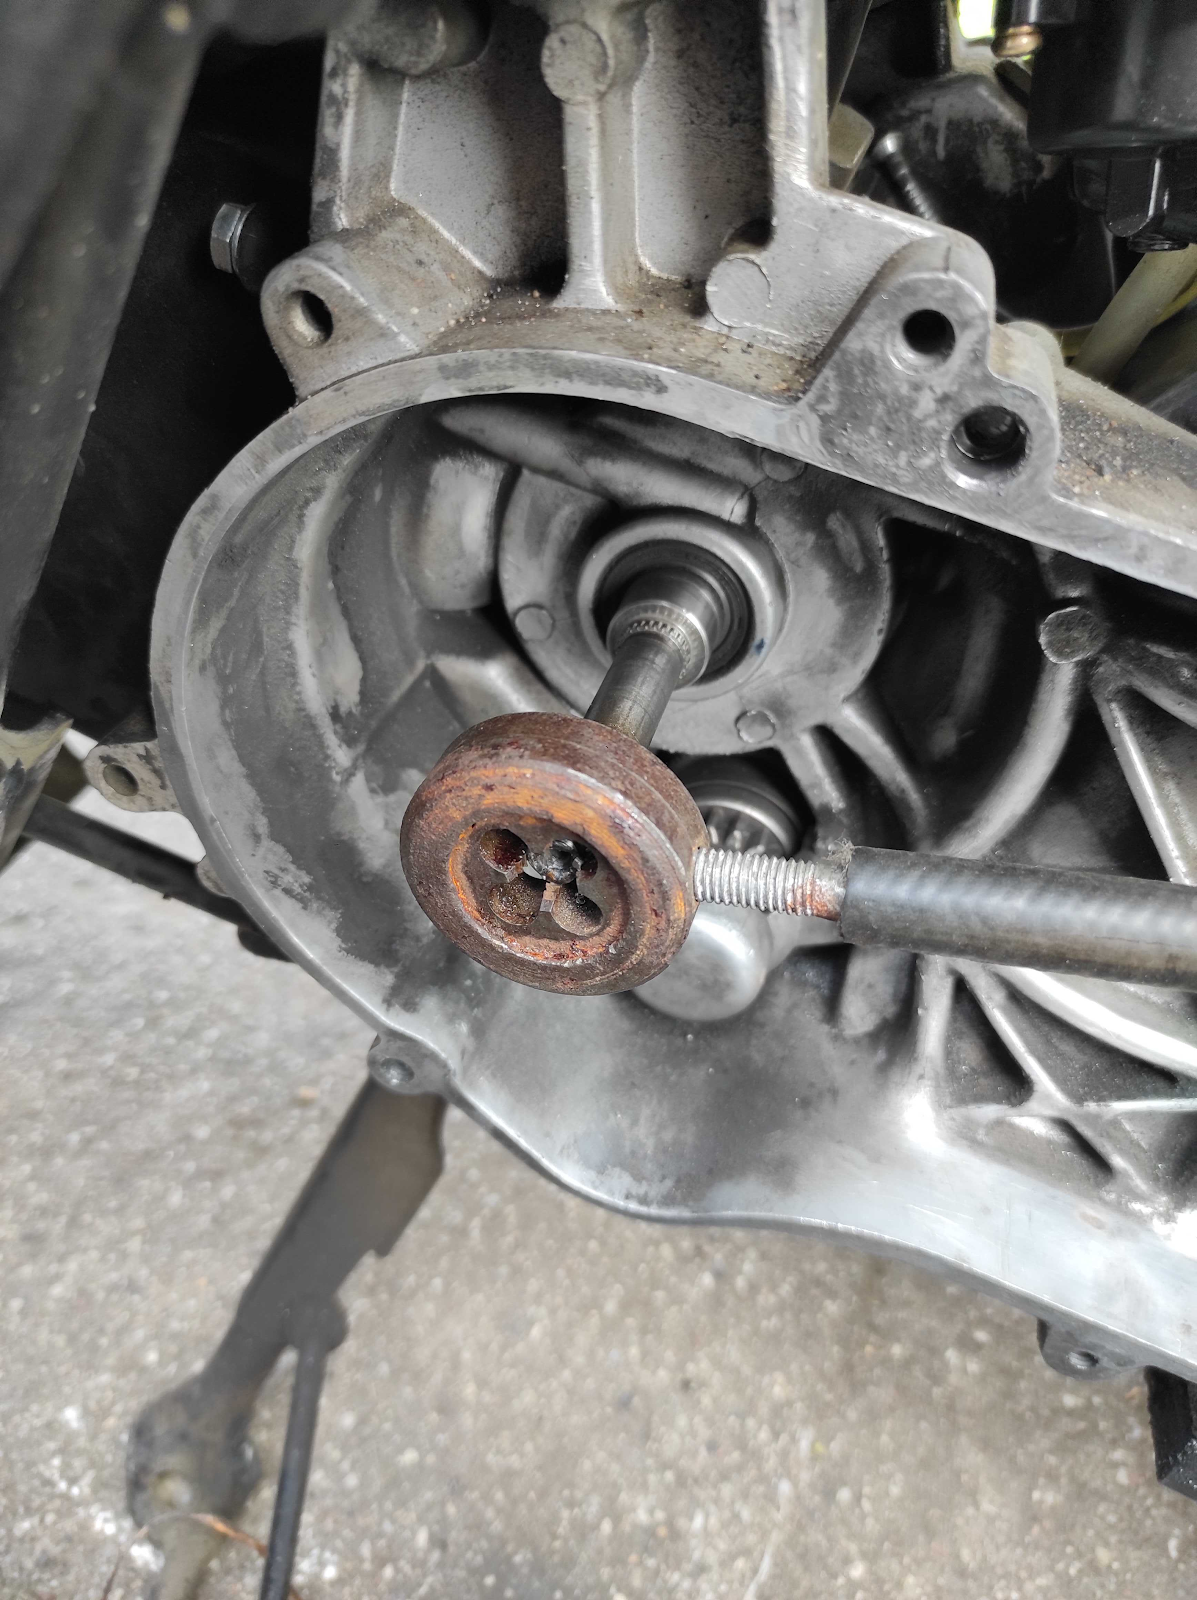
So during the weekend I came back home and took a closer look at what was going on. As it turns out the thread on the end of the crank shaft, which holds the variator assembly on, has been completely wrecked. Quite unusual until I noticed that the nut and the crankshaft had different pitch threads. The crankshaft had a fine pitch thread and the nut was a standard M10x1.5 nut. Some monkey thought that forcing a different nut on was the right choice. Oh boy.
Now, the correct way to go about this would be to buy a new crankshaft. But that costs the kind of money that my little bro doesn't have, and I'm not buying a new crank for him, because the moped is his responsibility. But what I can do is use my knowledge, tools and skills to show him how we can fix this crankshaft without even having to take it out of the engine. And how will we do this? Simple, we'll make new threads. Now there is always the option to downsize the OD and thread it for a smaller thread, but the next size down is M8 and the end of that shaft has a center point hole drilled in it, so there wouldn't be much material holding the nut in place.
So we need more metal, but how do you do that? Well with a welder of course. My plan was simple. We weld metal on the end of the shaft. We start the engine and angle grinder the OD to the correct diameter for an M10x1.5 thread. Yes, we're going with a normal coarse thread, because we don't have a fine thread die and nut. But I already know that with a spring washer and enough torque that nut will hold just fine. So that's where I started. I spotted around the end of the shaft, with my MIG welder, to keep the heat low and to not melt the end off.
Now we had another problem so contend with. First the aforementioned stripped splines on the starter gear and also what I assume would have been splines in the aluminum variator plate, which would engage with the crankshaft next to the nut. All of which sheared off without the pressure of the nut holding them on. So we had to do something to keep all parts of the assembly keyed to each other and to the crankshaft to make sure it all stays together. To do that I came up with a simple solution. I will simply weld a spot of metal to one part and remove the same amount from another. So that the weld acts as a key that keeps the assembly from spinning on the shaft. This is pretty much the best I could do at this point and since the whole assembly is ruined from getting spun out and ground up anyways, no harm will be done.
Assembling the variator was quite easy once all keys were aligned. To hold it together we bought some A2 stainless nuts and spring washers, because they are stronger than the grade 4.8 stuff we can get at the hardware store. The nut was tightened by hand until tight and the engine was rotated to make sure it's running true to the shaft. There was some wobble because one dimple wasn't deep enough, but after a little more grinding the fit was perfect and there was no more runout.
Once the cover was back on we tried out the kickstart, which was not working previously due to the old nut being a flange nut, which kept the kickstart mechanism from engaging the crankshaft. Everything worked just fine until the electric starter started acting up. Heh, good thing we got that kickstart to work. We took a quick look at the starter and it looks like the pinion on the starter motor shaft was not engaging the gear on the bendix but didn't see anything obviously wrong with the gears so I just told my little brother that he can fix the starter himself if he gets tired of using the kickstart. My work here is done!
Hey, you. Yes you, the reader. Thanks for visiting my blog!


Komentarai
Rašyti komentarą