Experimenting with various wick structures and some electrolysis.
Without the wick structure the only thing to bring the condensed working fluid back to the hot end is gravity. Because of this the heatpipe would only be able to operate in a vertical or near vertical position with the heat source being at the bottom of the heat pipe. If you want your heatpipe to work horizontally you need to find other ways to pump the working fluid back to the hot end. The easiest and most popular way is to line the inner walls of your heatpipe with a wick. Through capillary action the fluid flows back to the hot end where it can evaporate again. This grants you the ability to position your heatpipe in almost any direction without major efficiency losses.
I find myself to be quite intrigued by the wick structure and I spent today finding out various stuff about it.
I started today with some electrolysis. My plan was to create a porous copper crystal structure on the inner surface of my brass tube through electrolysis. I went out to buy myself some copper sulfate and started my electrolysis experiment as soon as I came home with my copper sulfate. I quickly found out that tap water is very bad for electrolysis. As soon as I put my copper sulfate in the tap water I noticed white stuff floating around in my solution. Trying to plate copper on a piece of sheet metal resulted in the plating solution tuning green and the only thing to plate on my sheet metal was some copper sludge - not good. One walk to the store later I had myself a bottle of distilled water. When I mixed up the plating solution an immediate difference from the tap water solution could be noticed. The solution was crystal clear and a very nice blue. As soon as I inserted my piece of sheet metal a bright red-ish brown copper layer quickly plated on it. And just like that everything for my electroplating experiment was set.
Now let me tell you how I got the idea to electroplate my wick structure. A couple of years ago I was very into making PCBs and I came up with the idea to add some plated vias to my PCBs. I did succeed at plating the holes but I noticed that I couldn't get a smooth surface finish. Turns out you have to put other kinds of chemicals to your electroplating solution if you want to plate a smooth and durable copper layer. I of course didn't have those chemicals. So having failed at making plated through holes in my PCBs I decided, just for the heck of it, to go and plate some other stuff. That's when i noticed that the longer I kept my electroplating going the rougher the surface got. In the end I could see that the surface was made up of many little copper crystals.
That is how I got the idea to electroplate my wick structure on the inside of the brass tube that I use for my heatpipe.
Before I go too far I need to find out whether I can create a usable and reliable wick structure within my tube. For that I cut off a 4cm piece of brass tube and inserted a thick copper wire inside. To hold the wire in the middle of the tube I used some enameled copper wire, which did eventually get in the way a bit. I started my connecting two Li-Po batteries in series through a 330 Ohm resistor to my anode and cathode. With this I got about 22mA of current going through, which was not enough. Luckily I found a 330 Ohm potentiometer and with that I set my current to about 50 mA. With that I could see shiny sparkly crystals forming inside the brass tube. Impatience coupled with curiosity quickly made me raise the current to 100 mA, which got the electroplating going much quicker.
A couple hours later I disconnected my batteries and pulled my tube out to check my progress.
That's when my copper wire spacers got in the way because while pulling out my copper anode the one of the copper spacers scraped along the inside taking off a very significant amount of my electroplated copper.

But this was actually a good thing, believe it of not, because this allowed me to very closely inspect the copper crystals. They were small but larger than I thought they would be, which is good. Also them being out allowed me to dry them out and with a drop of ethanol check how well they wick it up. The copper crystals were pretty good at taking the ethanol but the amount of crystals was too small to get any real result. This of course tells me one important thing - that my crystals are too brittle. I think there might be a way around this. I might be able to fuse the crystals together better by heating the tube up. This remains to be seen. While my tube was electroplating I thought I'd put a drop of ethanol on the plated and not plated part of the sheet metal that I copper plated earlier.

The drop was very small, just enough to wet the surface. On the unplated part the ethanol just sat there, only going wherever you push it. And while the plated part only had very little copper plated on it the difference was already there. As soon as I put the drop of ethanol on it immediately spread out along the surface, indicating that electroplated copper crystals do work as a wick.
Then I got the idea to compare how effectively the wicks that I've used, as well as a few new ideas, work against gravity. In order to see how high the fluid reaches I used a clear acrylic tube. My idea was to put the wick in the tube the same way I'd put it in my DIY heatpipe and dip the end in some ethanol. Then I would look at how high the fluid would reach by looking where it's touching the tube. It's important that the fluid touches the tube because in the case of a heatpipe that's what gets hot and is the part where the working fluid has to take heat away from for maximum efficiency.
First wick I tested was some braided copper shielding from some old tech. This wick is the one I used in my brass heatpipe.
 This wick got the ethanol to a height of 35mm.
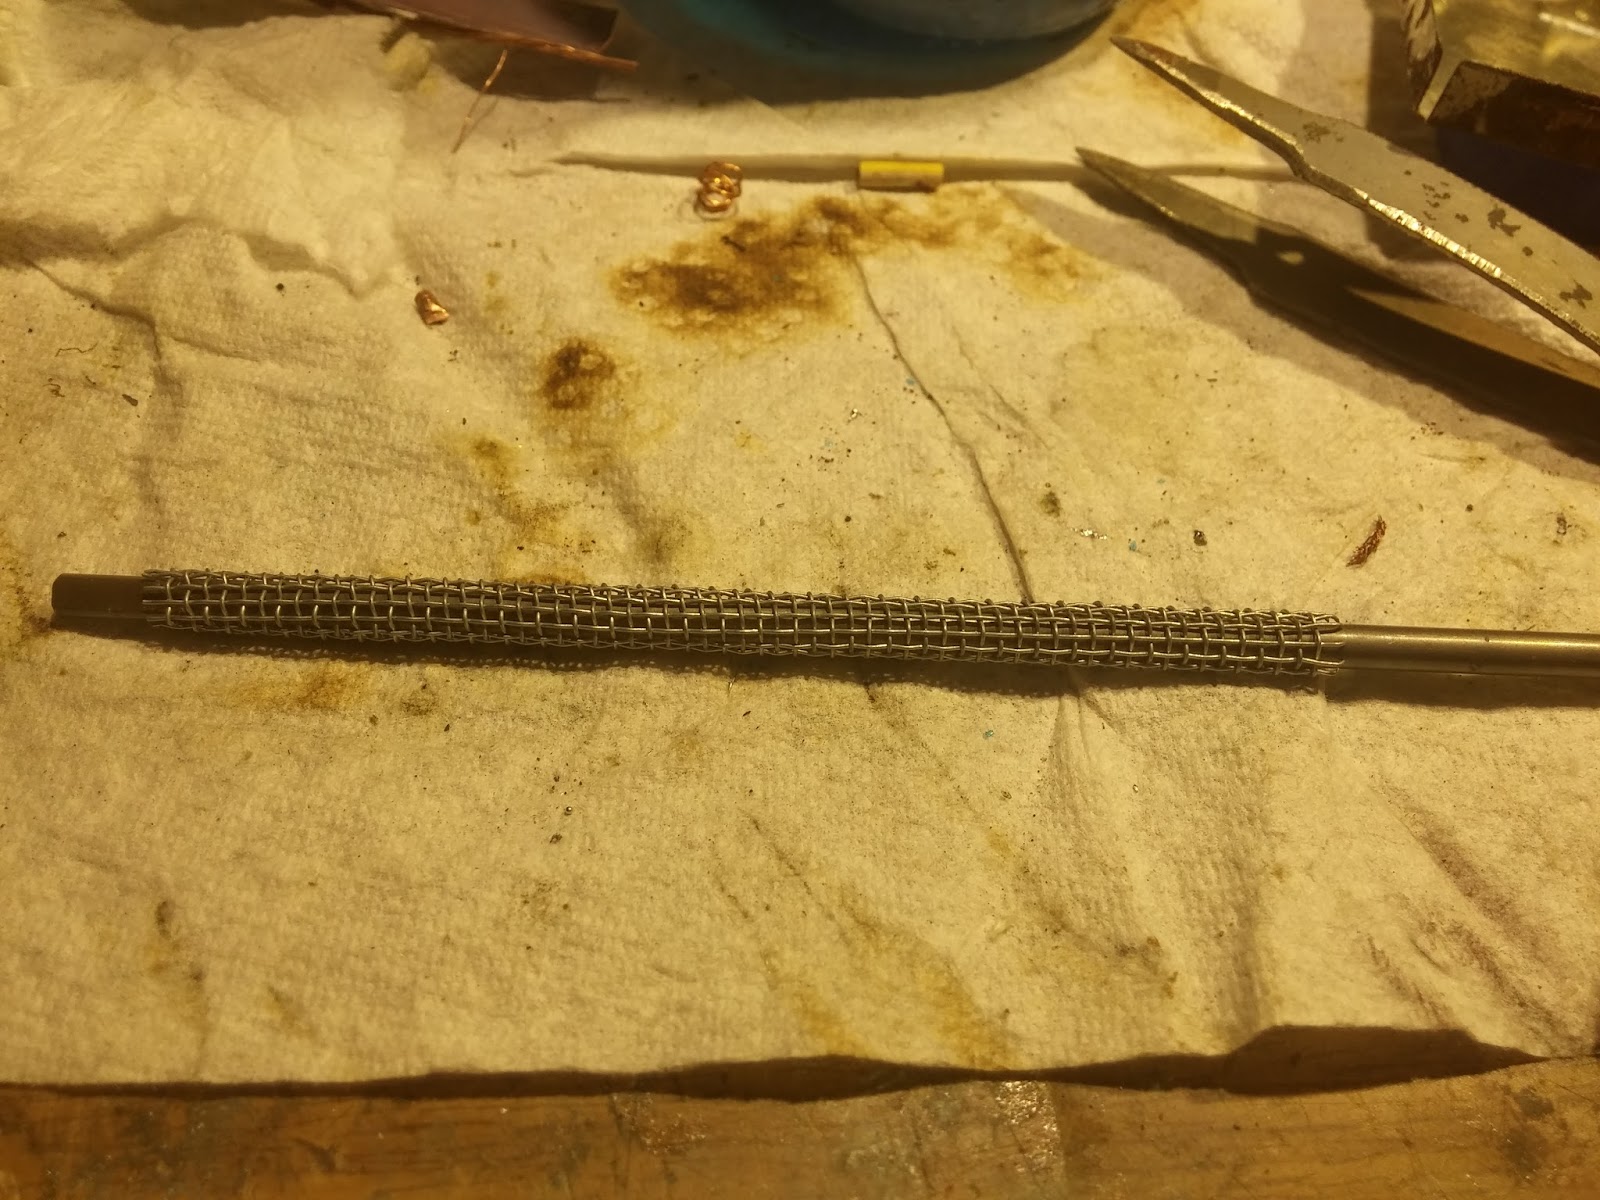
Second type of wick to get tested was a rolled up piece metal mesh. This was the wick I used in my first heatpipe.


 This wick structure only got the ethanol to a mere 7mm height, presumably if the mesh was finer it would wick the ethanol better.
Next up was curled and punctured tin foil. The tin foil was punctured by pressing it between two pieces of coarse sandpaper. It was punctured in order for it to have a place for the fluid to evaporate.
The foil was the shaped around the knurl of my screw driver handle and inserted in the tube. The foil wick turned out short because I only had so much knurl on my screwdriver. This here is one of the ideas that popped up in my head while testing other wicks.


The foil wick was quite impressive. The ethanol got immediately sucked right up to the 25mm mark. The only reason it stopped going up was because the foil was no longer touching the wall of the tube, which could be problematic in a bent tube.
After that I tried stripping the shielding off some TV antenna cable. The shielding of the antenna cable is also braided just like the braided shielding above but is a lot thinner and a lot less dense. I've also used this in one of my heatpipes, I don't remember if it made much difference, though.
 This one only just barely got the ethanol up to 15mm, which is far from great.
I do have a few more ideas for my wicks but those will have to wait for another day. I also have the 4cm length of brass tube in my electrolysis solution plating at 50 mA that I'll have run for the entire night to continue my experiments tomorrow.
That's all for now, thanks for reading.
I find myself to be quite intrigued by the wick structure and I spent today finding out various stuff about it.
I started today with some electrolysis. My plan was to create a porous copper crystal structure on the inner surface of my brass tube through electrolysis. I went out to buy myself some copper sulfate and started my electrolysis experiment as soon as I came home with my copper sulfate. I quickly found out that tap water is very bad for electrolysis. As soon as I put my copper sulfate in the tap water I noticed white stuff floating around in my solution. Trying to plate copper on a piece of sheet metal resulted in the plating solution tuning green and the only thing to plate on my sheet metal was some copper sludge - not good. One walk to the store later I had myself a bottle of distilled water. When I mixed up the plating solution an immediate difference from the tap water solution could be noticed. The solution was crystal clear and a very nice blue. As soon as I inserted my piece of sheet metal a bright red-ish brown copper layer quickly plated on it. And just like that everything for my electroplating experiment was set.
Now let me tell you how I got the idea to electroplate my wick structure. A couple of years ago I was very into making PCBs and I came up with the idea to add some plated vias to my PCBs. I did succeed at plating the holes but I noticed that I couldn't get a smooth surface finish. Turns out you have to put other kinds of chemicals to your electroplating solution if you want to plate a smooth and durable copper layer. I of course didn't have those chemicals. So having failed at making plated through holes in my PCBs I decided, just for the heck of it, to go and plate some other stuff. That's when i noticed that the longer I kept my electroplating going the rougher the surface got. In the end I could see that the surface was made up of many little copper crystals.
That is how I got the idea to electroplate my wick structure on the inside of the brass tube that I use for my heatpipe.
Before I go too far I need to find out whether I can create a usable and reliable wick structure within my tube. For that I cut off a 4cm piece of brass tube and inserted a thick copper wire inside. To hold the wire in the middle of the tube I used some enameled copper wire, which did eventually get in the way a bit. I started my connecting two Li-Po batteries in series through a 330 Ohm resistor to my anode and cathode. With this I got about 22mA of current going through, which was not enough. Luckily I found a 330 Ohm potentiometer and with that I set my current to about 50 mA. With that I could see shiny sparkly crystals forming inside the brass tube. Impatience coupled with curiosity quickly made me raise the current to 100 mA, which got the electroplating going much quicker.
A couple hours later I disconnected my batteries and pulled my tube out to check my progress.
That's when my copper wire spacers got in the way because while pulling out my copper anode the one of the copper spacers scraped along the inside taking off a very significant amount of my electroplated copper.

But this was actually a good thing, believe it of not, because this allowed me to very closely inspect the copper crystals. They were small but larger than I thought they would be, which is good. Also them being out allowed me to dry them out and with a drop of ethanol check how well they wick it up. The copper crystals were pretty good at taking the ethanol but the amount of crystals was too small to get any real result. This of course tells me one important thing - that my crystals are too brittle. I think there might be a way around this. I might be able to fuse the crystals together better by heating the tube up. This remains to be seen. While my tube was electroplating I thought I'd put a drop of ethanol on the plated and not plated part of the sheet metal that I copper plated earlier.

The drop was very small, just enough to wet the surface. On the unplated part the ethanol just sat there, only going wherever you push it. And while the plated part only had very little copper plated on it the difference was already there. As soon as I put the drop of ethanol on it immediately spread out along the surface, indicating that electroplated copper crystals do work as a wick.
Then I got the idea to compare how effectively the wicks that I've used, as well as a few new ideas, work against gravity. In order to see how high the fluid reaches I used a clear acrylic tube. My idea was to put the wick in the tube the same way I'd put it in my DIY heatpipe and dip the end in some ethanol. Then I would look at how high the fluid would reach by looking where it's touching the tube. It's important that the fluid touches the tube because in the case of a heatpipe that's what gets hot and is the part where the working fluid has to take heat away from for maximum efficiency.
First wick I tested was some braided copper shielding from some old tech. This wick is the one I used in my brass heatpipe.

Second type of wick to get tested was a rolled up piece metal mesh. This was the wick I used in my first heatpipe.


Next up was curled and punctured tin foil. The tin foil was punctured by pressing it between two pieces of coarse sandpaper. It was punctured in order for it to have a place for the fluid to evaporate.
The foil was the shaped around the knurl of my screw driver handle and inserted in the tube. The foil wick turned out short because I only had so much knurl on my screwdriver. This here is one of the ideas that popped up in my head while testing other wicks.


The foil wick was quite impressive. The ethanol got immediately sucked right up to the 25mm mark. The only reason it stopped going up was because the foil was no longer touching the wall of the tube, which could be problematic in a bent tube.
After that I tried stripping the shielding off some TV antenna cable. The shielding of the antenna cable is also braided just like the braided shielding above but is a lot thinner and a lot less dense. I've also used this in one of my heatpipes, I don't remember if it made much difference, though.

I do have a few more ideas for my wicks but those will have to wait for another day. I also have the 4cm length of brass tube in my electrolysis solution plating at 50 mA that I'll have run for the entire night to continue my experiments tomorrow.
That's all for now, thanks for reading.


Komentarai
Rašyti komentarą