DIY analog ammeter/voltmeter from scratch.
I thought it would be fun to make myself an analog meter. For that I gathered some scrap from around the bench and went at it. The construction of my meter would be basically the same as it is in modern analog meters with a cylindrical magnet in the center, the coil assembly around it and some metal around to help strengthen the magnetic field.
For my materials I used some sheet metal from the enclosure of a floppy drive, some very thin copper wire, super glue, hot glue, metal shears, aluminum from a beer can, a bit of wooden dowel and a bit of thicker copper wire.
I started out by cutting a notch in the center of my wooden dowel.

I used this to make my center cylinder magnet. I decided to try make mine an electromagnet but a permanent magnet can also be used.

The armature for my electromagnet turned out great, except for one thing, winding my copper wire around this was quite bothersome so I quickly came up with dowel version 2.

I used this dowel to bend up my electromagnet armature. At first the sheet metal would be bent to a "Z" shape and put into my dowel ver. 2. Then the sheet metal would be bent around the dowel over the sharp corner and you would get something like in the above picture above but with a little spot to wind your wire.
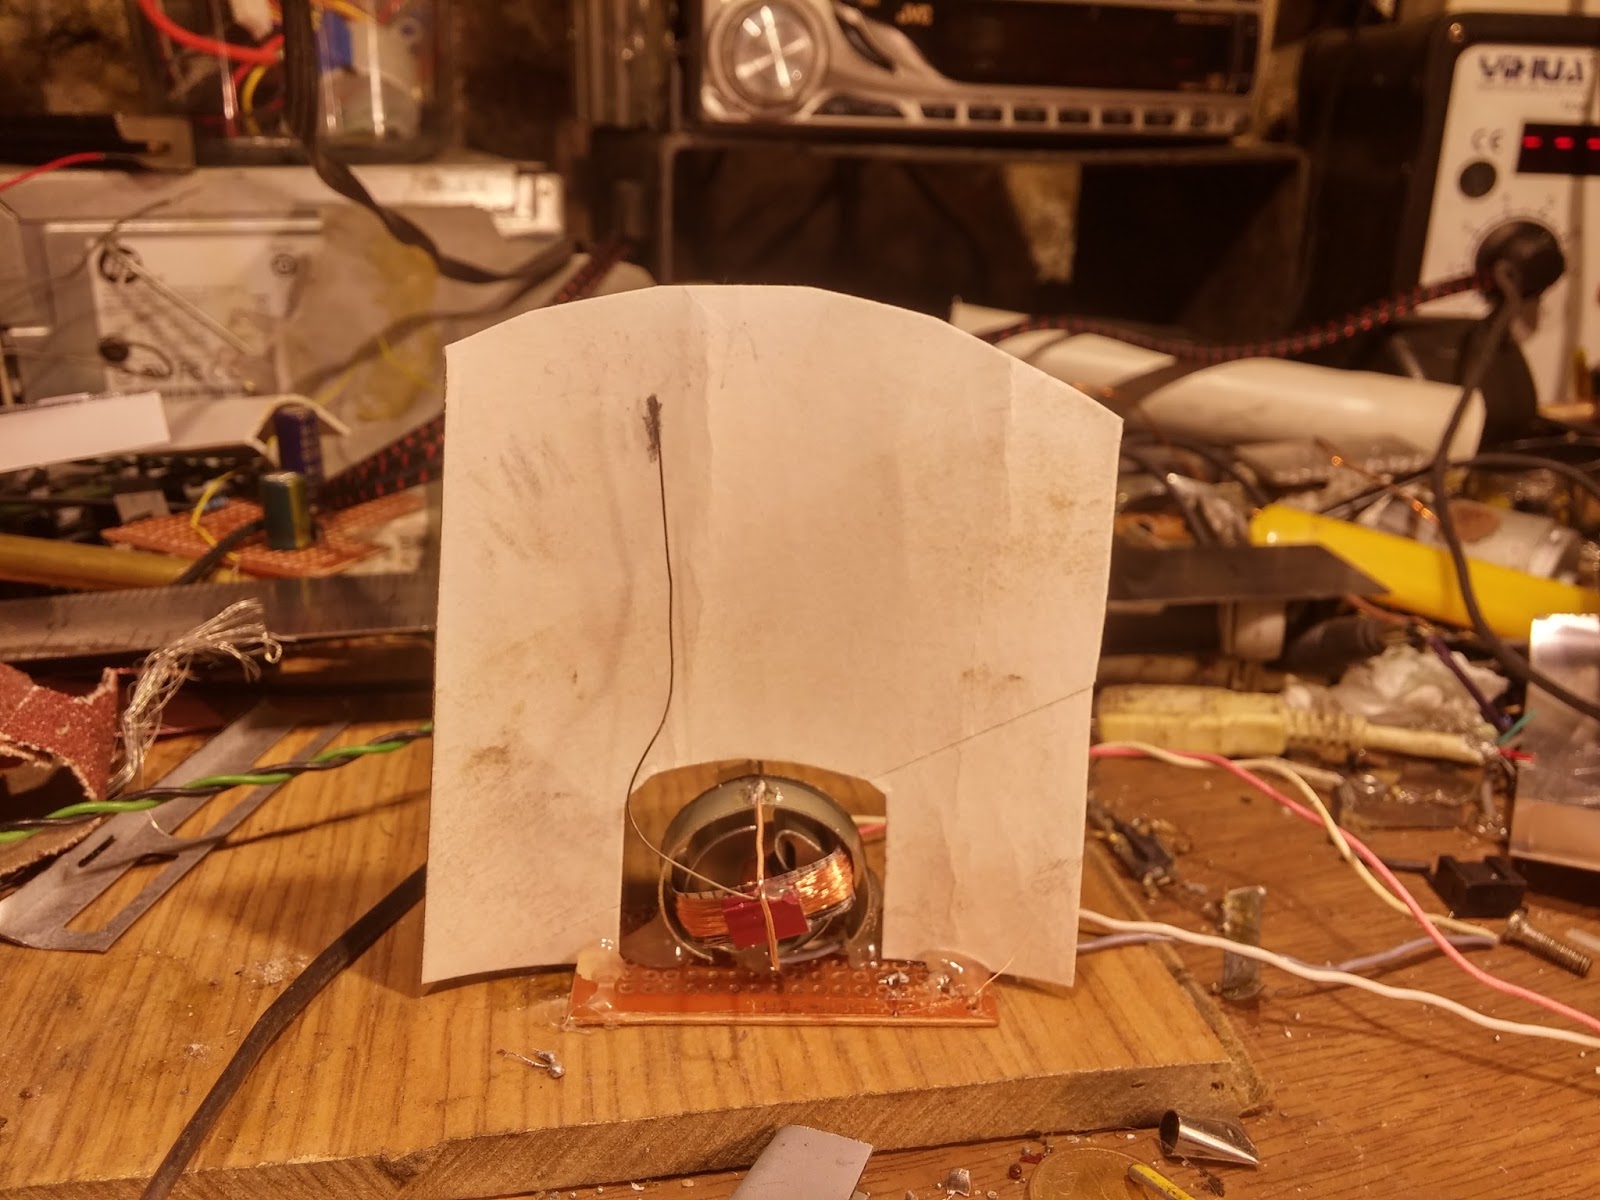
Looks like my phone refused to save the following few pictures so you'll have to use your imagination for a bit.
Carrying on swiftly. I then bent some sheet metal around the dowel to form a ring and bent it out to increase the radius. The reason behind this is that my coil assembly has to fit in between and have enough space to move freely. I then wound copper wire around the center of my electromagnet until I got tired of winding and then soldered and secured two leads to the thin magnet wires to avoid having them break off. I then wrapped some electrical tape around the newly made electromagnet and on top of that I wrapped some sheet metal from a beer can. The aluminum from the beer can serves as a frame for my coil assembly, this is the part that moves around when you measure stuff. A bunch of thin copper wire was then wound around the aluminum frame and super glued to keep the copper wire in place. The core of my analog meter was then assembled on a scrap of prototyping board with hot glue. I then took two pieces of aluminum sheet, put a dimple in each and glued them on my coil assembly. The dimple works as a bearing to help keep my coil assembly rotating in its spot. A thicker copper wire was bent into a "C" shape and soldered to the top of my meter frame. This copper wire is there to hold my coil assembly suspended and rotating. The coil was then positioned between the two points of my copper wire so that the ends of the copper wire sit in the dimples of the aluminum bearings I made. The thin copper wires coming from my coil assembly were soldered to the pads of the proto-board, a pair of leads were soldered to the same pads.


The sheet metal I took from the floppy drive is magnetic, which helps carry the magnetic field and with the help of the outer sheet metal ring makes the magnetic field stronger. The thin copper wires act as my springs and help kept the coil assembly centered. Bumping the coil assembly would make it move around but it would always come back to the same spot. The coil movement was binding up a little but a couple tiny drops of oil on the bearings made the movement much smoother.
So now that the core of my meter was done it was time to test how it works. To do that I connected both the electromagnet and my coil assembly in parallel and connected it to a Li-Po battery. As soon as I connected the battery the coil assembly turned a little.

It took about 220mA to move the coil assembly this much, so the sensitivity is not great. Now to make this a real analog meter I glued some cardboard on and glued a piece of steel wire on the coil assembly.

A mark was placed where the iron wire naturally sat. The battery was then connected again and another mark was placed to the spot where my needle moved to.

In the picture you can see that there are two marks and but the needle is way off. The reason behind this is that the second mark is from when I connected the battery to place the second mark and then pushed the meter to full scale. After that instead of returning to the zero mark it returned to the second mark. I then connected the battery again and took the picture you see above.
The thin copper wire while being springy is not springy enough so when the meter went full scale the copper wire deformed and the needle couldn't return to its zero point. To remedy this i tried making a spring to allow the needle to return to its zero point.

Getting the spring in was probably the fiddliest job ever. I even had to make two of these because I lost one but alas I got it in and it did help with returning the needle to zero point.
The needle had to be adjusted to sit on the scale properly and a new zero mark was placed.

With the battery connected the needle showed much more movement than before. This is because the spring I made is very soft. After the battery was disconnected the needle returned close to its zero point but not right on it. I think this is because when making the aluminum bearings I punctured the aluminum and the copper wire is touching the hot glue that I used to secure the bearings on causing the needle to stick slightly.

I think this meter turned out great. The next improvement would be to add a neodymium magnet instead of the electromagnet. There is one advantage that the electromagnet gives and that is that the meter has no polarity and can be connected any way. This is the same principle that lets universal motors be universal. Just like a universal motor this meter should also work with both AC and DC current.
That's it for now, thanks for reading.


Komentarai
Rašyti komentarą