Pranešimai

Why a getting welder is a level-up in life.
Vaizdas
     I can still remember many years ago how I tried to stick things together with screws, glue, this, that and the other. But deep inside my heart I knew that a welder was the answer to all my questions. Well the metal related ones at least. So through a relative I found some yard work and spent my entire summer chopping wood. After all the work was done I was left with some money, not much but hopefully enough to buy myself a welder. So I kept all that money safe until that fateful day when I found a welder in the flea market. It was an old "Schweisstechnik" AC buzzbox, so old you can't even find it on the internet. Adjustable current up to 110A at one phase and a max 180 amps with three phase power. But best of all, it was within my budget. So of course I immediately bought it and with the help of my cousin we both carried the absolute boat anchor of a welder into my dad's car.      As soon as the welder was home I started looking for bits of metal to t...
Don't have a body panel hammer? Make one! Here's how I made my DIY body panel hammer in 30 minutes.

Vaizdas
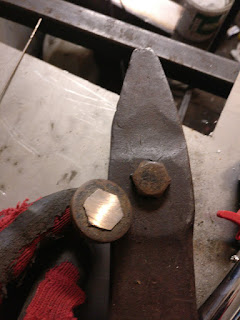
     A year ago I bought myself a classic car and this summer I finally found enough time to repair the rusted body panels. But as the problem with most classic cars is, there's no parts for sale and when they become available they cost a fortune. So hobbyists like me and many others alike have to DIY their own body panels. There are specialized tools for beating body panels and working sheet metal, such as the classic hammer and dolly which are the bread and butter of panel beating.       Up until now i've been using a regular hammer but it's old, it's square and it doesn't leave a nice finish. For hammering nails into wood it's been fine. Body work? Not so much. So I got tired of it and decided to make my own. Buying one is not possible because there are none for sale locally and it would go against my DIY nature. So let's make it!        First I started off by scavenging for scrap steel. You can imagine the basic shape of the hammer...

Procrastination, more than ever before! [a little update :) ]

This will be a little update on what I've been up to and what will be in the future. I've been putting this off for a while but whatever I'll do it now. Basically I've been either too busy or too lazy to make a post. Being in a university is pretty cool but it sucks alot of time out and I study far away from home where my workshop is, so it makes it harder to work on projects. So, first some updates... The watercooled laptop might make a return but I'm not sure. I've already tested the MK2 waterblock and the results were interesting if a little underwhelming at the same time. Going by memory, the GPU temp dropped by about 15C, while CPU temp only dropped by 5C. The reason why the CPU temp didn't drop as much as the GPU was because my waterblock wasn't perfectly flat. It was actually pretty cool holding the coolant resrvoir and feeling it heat up. But to push the project further forward I would need to make a MK3 waterblock and making those is very ted...

Crap Diodes! The truth about the 150EBU04 eBay special.

Vaizdas
I recently finished making an inverter MIG welder but as soon as I tested it out the damn thing blew apart. Now why is that? One could say that I'm dumb and unable to make a proper welder but it's actually not that (not this time at least). The welder had previously underwent testing and worked flawlessly but all the testing was done on 12V. As soon as I tried pulling the trigger on 230V it blew three of the four primary switching IGBTs. At first I assumed the IGBT's were the problem, but when I rebuilt the switching stage with MOSFETs I still had nothing on the output. This made me question the secondary rectifier diodes, a quick diode test with the DMM revealed that they were all shorted, seems weird since the welder was unloaded so no current should have been flowing through the diodes.  The diodes were marked 150EBU04 and they were supposed to be 150A, 400V diodes but as it turned out they were far from that. Considering I got them from eBay this isn't entire...

Making a 10x10cm CNC XY plotter from scrap parts....and then adding a laser to it!

Vaizdas
Recently I had a few weeks off and during that time I finished one of my longest lasting projects - the 30€ 3D printer. During that time I got interested in CNC stuff and since I'm so budget minded (courtesy of my empty wallet) I started thinking of ways to make CNC cheaper, better and more available. This might seem like a far stretch but to me it was actually pretty doable. First I started out with what I want my build area to be, 10x10cm seemed pretty good and should work well for what I'll be doing with it. So I took a piece of paper and started drawing what I want my little plotter to be, the 10x10cm build area being the first thing I drew. You might notice that there's a 2x2cm square, that's the bit that will be moving around the whole build area with whatever is mounted to it. When designing most of my projects I just wing it and make whatever looks nice, I can then refine the design into something more sensible. The 2x2cm square was extended to 2x3cm to leav...