Homemade heated glass bed for my 3D printer.
A couple months ago I finished my third homemade 3D printer. The objective was to make it as cheap as possible by avoiding all unnecessary expenses. In the end the printer came out well under 100€, with almost enough to spare for a 1kg spool of PLA.


Once all the wire was set in place I covered all the points with epoxy to make sure they stay in place because I had a couple points come loose from the glass. The super glue bond is only just enough to keep the wire in place. I planned to cover the entire bottom surface to lock the wires in place but as it turned out I only had enough epoxy for the ends.

So as the epoxy cured I went out to get some more and came back with some 5 minute epoxy. There's no need to use any fancy high temperature epoxy because as i've noticed the cheap stuff holds well. As the bed heats up the epoxy softens, which is a good thing because the copper expands and, if it is attached to the bed rigidly, will warp the glass.

At this point the epoxy was hard but not completely done curing so I decided to hook it up to 12V and let it heat up. This heating up helped cure the epoxy further as well as allowing me to check how hot it gets. Resting on the foam like this with a thermocouple beneath the glass pane I get a reading of more than 70C. In open air the temperature would be lower perhaps somewhere between 60 and 50C. This should be about right for PLA. I'm not using any temperature regulation for my heatbed so if I wanted more heat i'd have to increase the voltage to the bed. This is why I said previously that for my application the heating element came out perfect.

After this the bed was finished and was installed on my 3D printer. Due to the surface roughness underneath and the increased thickness it took some extra time to level the bed but in the end it leveled out well enough. While adjusting the level on the bed I could tell that the bed warped slightly as it heated up but it wasn't too bad. This is mostly because the wire is dstributed evently and on the edges of the glass the bed is colder so the middle expands more and warps the bed slightly. Normally the heat distribution is adjusted to account for this difference in temperature. In my case the printer works and there wouldn't be enough of an improvement in the print quality to warrant making a new bed.

At first my printer would go into thermal runaway due to the heat from the bed interfering with the hotend but after some PID tuning I got it all under control. Peeling off the first few failer prints felt oddly satisfying because of how soft and strechy the PLA was coming off the hot bed. After PID values were tuned I continued printing without problem.
One of the cost cuts was to omit a heated bed and instead use a piece of regular window glass as the bed surface. With the help of a heatgun the temperature of the bed could be brought up before a print and most of the time that would be enough to keep the part stuck to the bed.
The problem with heating the bed this way is that it's hard to keep the heat uniform and all the hot air coming from the heatgun also interferes with the hotend and causes instability so it was not ideal. Nevertheless I continued printing this way because it already worked well enough for the small prints I was making.
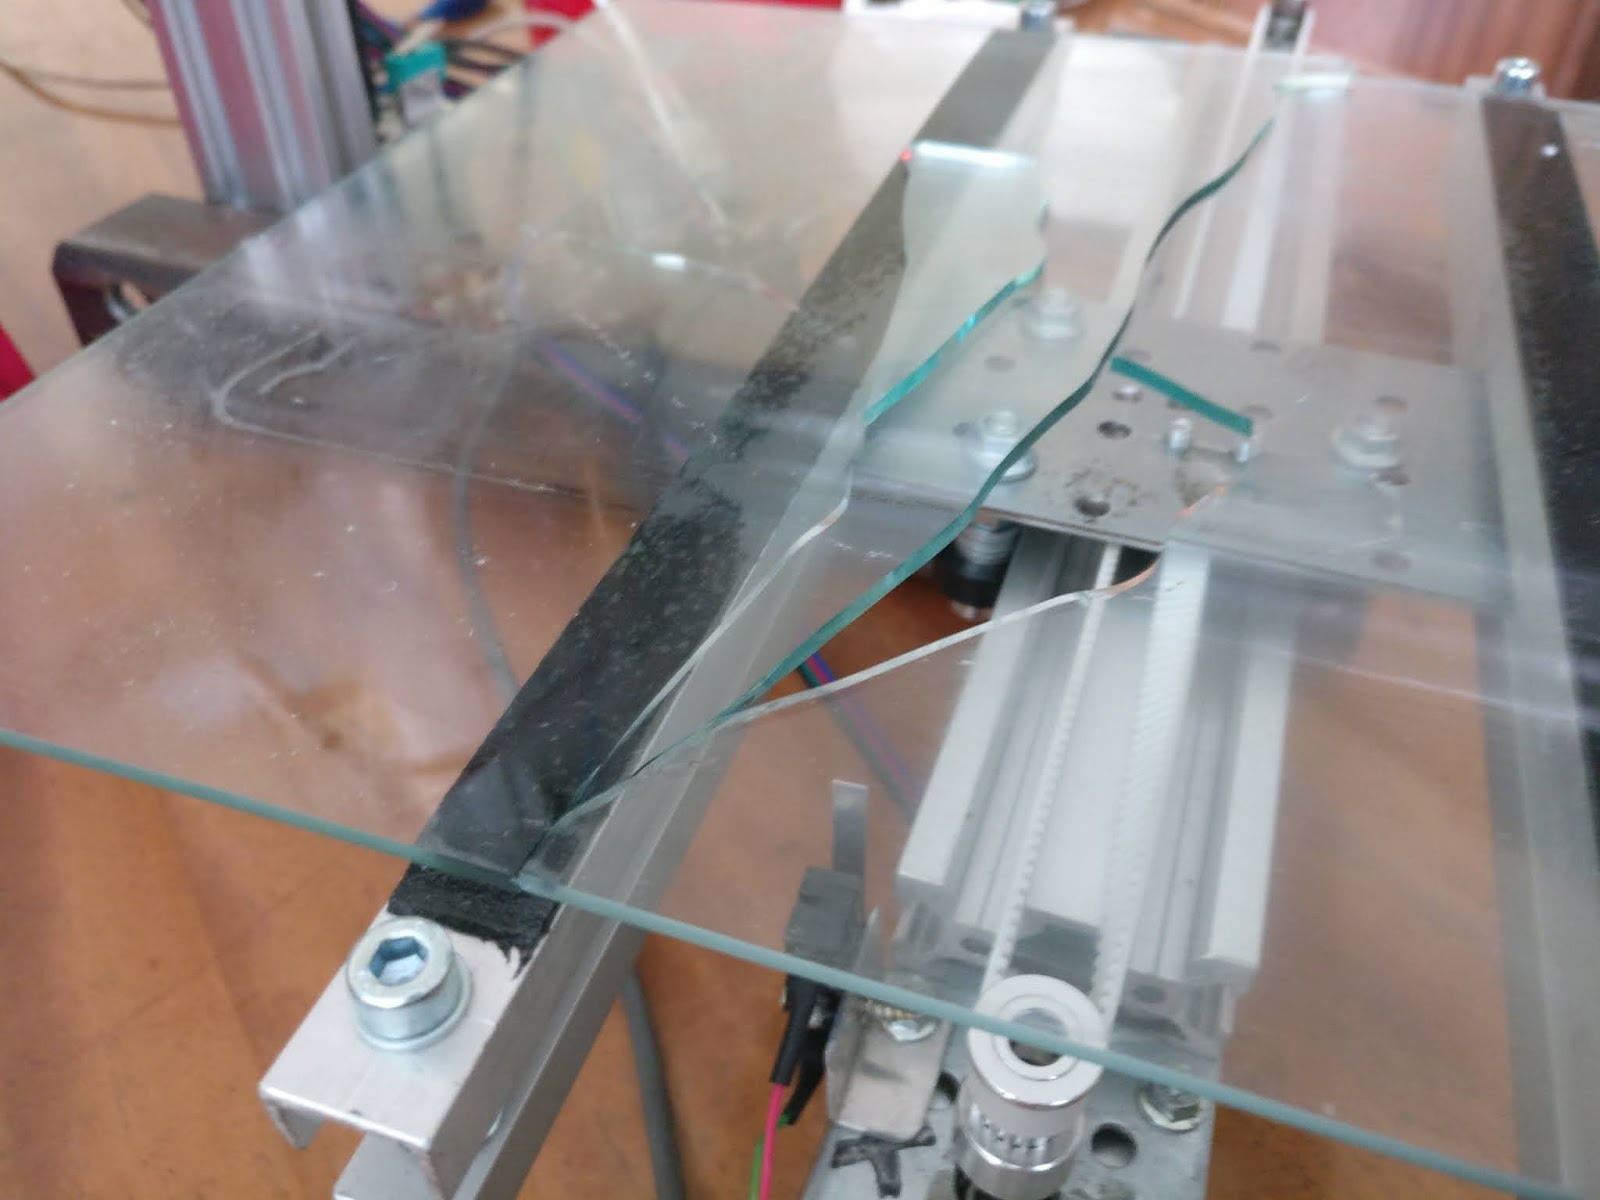
Not long after completing the printer I overheated the piece of glass and caused it to crack. At the time I attributed this to the jagged edge of the piece of glass because the cut I made was quite rough. So I cut another piece of glass from an old glass window and this time I also wet sanded all four edges to make them smooth in hopes that this would degrease the number of stress risers. For a while this new bed worked quite well and tolerated heat without a problem. This could also be a result of me being more careful when heating the bed with my heatgun.
Unfortunately just a couple days ago I was heating the bed up and kept the heatgun still for just a little too long until *PANG* the glass bed shattered. At this point I was quite disappointed because it took hours to sand the glass bed edges perfectly smooth and I didn't feel like making another one because of that.
So I started looking around for what's the cheapest heated bed I can get and they range from 15€ + shipping for an aluminum one to 25€ + shipping for a heated glass bed. Not terrible but none really fit my build volume and I don't like waiting for things to ship. I want to print NOW and the only way to do that was to make my own heated bed. So I made one, and it was actually a lot easier than I expected.
I started off by cutting out a piece of glass for my bed. This time I didn't bother sanding the edges smooth but only brushed over them a couple times to take the edge off so I don't cut myself.
To heat the glass bed I decided to glue copper wire to the underside in a zig-zag pattern. Normally for a heater you want to use appropriate wire, such as nichrome but in this case nichrome would have too high of a resistance to work properly and would also be way too stiff to lay on the glass pane evenly so that it wouldn't cause hot spots. In my case I used 0.4mm copper wire and on my 200x240mm build surface the resistance came out at about 2 Ohms, which is about perfect for my application. This should give me approximately 72W of heat at 12V. I say "approximately" because the resistance of copper increases as it heats up and the current along with the power will decrease as a result. Also the voltage drop in the wires leading to the heating element will decrease the power further.
Next I cleaned the glass surface with some solvent to make sure my glue stuck to it as well as possible. Then I laid the wire on the glass by gluing it from point to point going in a zig-zag pattern. To glue the wire I used super glue with baking soda. This way I could lock the wire in place quickly and continue to next point.
Once all the wire was set in place I covered all the points with epoxy to make sure they stay in place because I had a couple points come loose from the glass. The super glue bond is only just enough to keep the wire in place. I planned to cover the entire bottom surface to lock the wires in place but as it turned out I only had enough epoxy for the ends.
So as the epoxy cured I went out to get some more and came back with some 5 minute epoxy. There's no need to use any fancy high temperature epoxy because as i've noticed the cheap stuff holds well. As the bed heats up the epoxy softens, which is a good thing because the copper expands and, if it is attached to the bed rigidly, will warp the glass.
I mixed up a little over half of a 25ml tube of epoxy and spread it out along the entire bottom surface of the glass pane. I then put a piece of foam with a layer of cling film in between to keep the foam from sticking and I then put a flat piece of plywood on top and some weight to press everything together. The point of this was to press the copper wire flat against the glass to make sure it transfers heat as well as possible. The unfortunate consequence of this was that the cling film wrinkled quite alot and the surface came out looking very rough. This does not effect the print quality in any way. The bed just doesn't look as good.
At this point the epoxy was hard but not completely done curing so I decided to hook it up to 12V and let it heat up. This heating up helped cure the epoxy further as well as allowing me to check how hot it gets. Resting on the foam like this with a thermocouple beneath the glass pane I get a reading of more than 70C. In open air the temperature would be lower perhaps somewhere between 60 and 50C. This should be about right for PLA. I'm not using any temperature regulation for my heatbed so if I wanted more heat i'd have to increase the voltage to the bed. This is why I said previously that for my application the heating element came out perfect.
After this the bed was finished and was installed on my 3D printer. Due to the surface roughness underneath and the increased thickness it took some extra time to level the bed but in the end it leveled out well enough. While adjusting the level on the bed I could tell that the bed warped slightly as it heated up but it wasn't too bad. This is mostly because the wire is dstributed evently and on the edges of the glass the bed is colder so the middle expands more and warps the bed slightly. Normally the heat distribution is adjusted to account for this difference in temperature. In my case the printer works and there wouldn't be enough of an improvement in the print quality to warrant making a new bed.
At first my printer would go into thermal runaway due to the heat from the bed interfering with the hotend but after some PID tuning I got it all under control. Peeling off the first few failer prints felt oddly satisfying because of how soft and strechy the PLA was coming off the hot bed. After PID values were tuned I continued printing without problem.
This new heated bed made printing much easier. No longer do I have to preheat the bed by hand and can focus more on removing the ooze from the nozzle and other more important things. The printer is now much easier to use to a point where i can just click print and it just works. Also I don't have to worry about the print coming loose due to the bed cooling off, which makes larger prints possible. I also think that I should have made the heated bed from the start instead of using a bare glass pane because of how big of an improvement it is.
Some things to note:
* You can use online calculators to calculate the resistance of your heating element before you make it. This way you can decide on the spacing and what thickness of wire you use. Especially if you only have a certain thickness of wire, as happens when you salvage copper wire from electronics. The wire I used was salvaged from an old CRT TV degaussing coil.
* When you pour the epoxy to seal the wire in place you can also dip in a thermistor for temperature measurement if you plan to make the bed temperature controlled.
* Normally beds are around 1 Ohm or lower in resistance so if you want to make a temperature controlled heated bed you should aim for this value.
* My bed is not temperature controlled and just settles at the right temperature when I plug it straight into 12V.
* It is possible that with larger prints the bed temperature might get too hot because of the plastic covering the surface and not allowing the bed to cool off convectively but I don't have any big prints like that in mind so for me it's not an issue.
Anyways, that's it for now. Thanks for visiting my blog!


Komentarai
Rašyti komentarą