Modifying an old PC power supply into a lead acid battery charger.
I like driving my homemade e-scooter around and so does my younger brother and now also my friends, but the battery is weak and requires charging often. Up until now I've been charging my battery through an old UPS that I found thrown out. The UPS had a dead 12V lead acid battery so it was already set up to charge and maintain lead acid batteries. Sounds great, but the problem is that it charges at only 0.6A and to charge something like a 52Ah battery would take over 80 hours, which is forever. So I decided to make myself a battery charger.
I've tried making a battery charger out of an ATX power supply before but the problem is that they're not meant to go far over 12V and if I remember right mine could barely reach 13.5V and to bulk charge a lead acid battery you want 14.4V. The reason why they can't go much over that voltage is that they're based on a push-pull topology, which means that the output voltage is limited by the transformer primary to secondary ratio. Ideally for this you want what's called a flyback topology, meaning that the power supply output voltage covers a much larger range and is not strictly limited by the transformer ratio. The drawback of flyback SMPS is that they're limited to about 150W most of the time, hence why more powerful power supplies go for push-pull. But in this case 150W is more than enough to charge a lead acid battery.
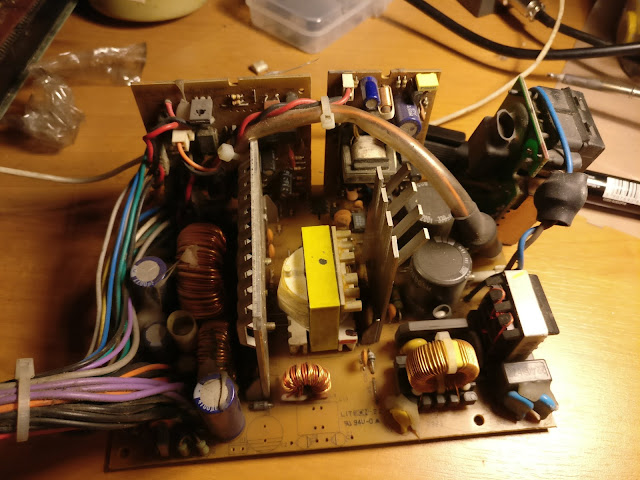
The power supply I chose for my mod is an old PC power supply, that looks like an ATX power supply but does not meet the ATX form factor standard. Otherwise it has the usual outputs with the usual plugs and also a quirky 4kBit EEPROM chip that connects to the outside world with an 8-pin molex connector. But more important than that is that the power suppply is based on a flyback topology. Also as an added bonus it has the switching IC on the primary side and there's only one opto-coupler for voltage feedback. Usually ATX power supplies have an SMPS IC on the secondary and along with that have a complicated feedback and fault detection network that can be a pain when modifying the power supply to do something else.
To convert this power supply I needed to do two things. First I needed to increase the voltage from 12V to 14.4V and second I needed to add a current limiting circuit to not overload the power supply. To achieve this I decided to not even bother modifying the original feedback circuitry and to just cut the traces connecting the opto-coupler to the feedback circuit to connect my own feedback circuit to it.
The feedback circuit is very simple and uses an LM358 dual op-amp. It senses the current through a 0.02 Ohm current shunt on the low side and the voltage through a resistor divider. The current shunt voltage is compared to a 60mV reference voltage derived from the 2.5V voltage reference created by the TL431 reference IC. The voltage is measured by dividing and comparing the supply voltage to the 2.5V reference voltage. Both outputs of the opamp are joined through diodes to keep both outputs from interfering, along with 1n feedback capacitors to keep the feedback circuit from overcompensating and oscillating. D1 and D2 can be replaced with LED's in which case they would work as CC and CV indicator LED's. R3 should be connected to the other side of the current shunt for accurate voltage regulation, but in my case it was more convenient to connect it this way and the voltage drop was insignificant. The current limiting in this crcuit is set up for around 3A, which I think is a reasonable charge current. I think the current limit is important to keep the PSU from overloading. My previous ATX PSU battery charger would overload and shut down if I plugged in a battery that was too far discharged.
When I tried the PSU out everything worked out perfectly fine and the voltage ended up at 14.3V, which is perfectly acceptable. The current would limit at about 2.9A. So all in all I think this charger was infinitely more succesful than anything I've attempted before, probably because it's actually usable this time. Now the scooter battery charges much quicker than it did with the UPS and I think this charger will come in handy many more times again in the future.
Anyways, that's it for now and thanks for visiting my blog.


Komentarai
Rašyti komentarą