Homemade electric scooter part 2: The Upgradening.
Over the night the upgrade fairy came and pimped my electric scooter. And by upgrade fairy I mean me, I did the upgrades.
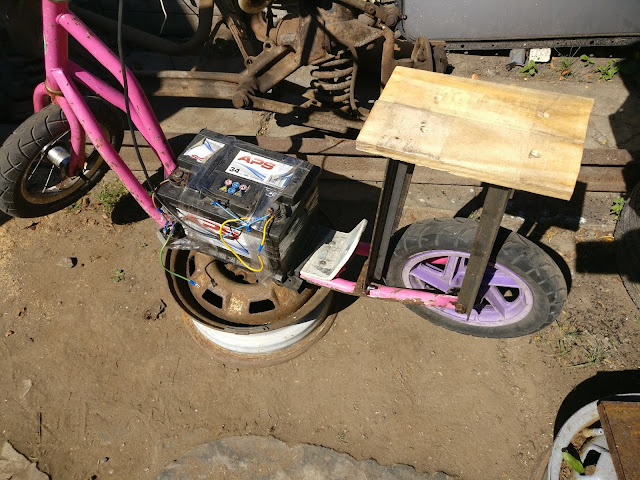
Anyways, the scooter badly needed a seat. There wasn't enough space on the deck of the scooter to stand on and I didn't feel like lenghtening the frame, so the seat was the most logical option. And of course I kept on with the theme of this build being completely from scraps while making the seat as well. For the seat frame I used some more of the 25x25x3mm angle iron I had around. I used the existing holes and mounting spots in the frame to mount the seat. On top of this frame I added two pieces of pallet wood to sit on, as raw metal happens to be a bit rough on the cheeks.
This seat frame also doubled as a new mount for the motor, in fact it worked out much better than the previous mount because it held the motor much more securely and allowed me to adjust the motor position and roller tension. Also the previous mount had some welds in it to keep it rigid but this new frame only uses nuts and bolts so it's even more DIY friendly. As an added bonus it also looks much neater.
After this I took the scooter for a quick drive and it felt alot better than before. Now it was more comfortable and it drove better because of the improved motor position. But it still lacked a proper throttle switch and I had grown tired of shorting the wires whenever I wanted to go.
So I started rummaging though the boxes of stuff from my old SAAB and found a switch from the interior lights. This switch was about the perfect size but it was not a momentary switch so I pulled it apart and added two springs inside to return the switch to its center position. This switch is also what you'd call a double throw switch, which means that there's three positions.
Normally you'd only want two positions on your switch (ON and OFF), but I had a special something in mind for this scooter. That special something being an electric brake. Now it might seem complicated but all this brake does is short the electric motor so that it resists rotation and thus achieves braking. But as soon as I connected the switch to the brake it would make my motor relay buzz so I had to find out why that was and as it turns out the switch needed a little bit of modification to the internal contacts to work. But after some mods it started working as intended and, of course, I had to take the scooter for another test drive.
The test drive was successful and I managed to measure the top speed which had increased to 17km/h. And of course not long after my younger brother came out and asked if he could ride my scooter. I let him have a go, but after a quick drive I noticed the motor was heating up and that's expected. Normally the motor would have airflow going through it but this time there was none. To fix this I taped an 80mm PC fan to the motor and connected it in parallel to the motor. This way the fan only spins when the motor is running but the motor only gets hot during longer drives so it's all fine in this case. But the proof of the pudding is in the eating so I let my younger brother make a couple laps around the block with the scooter and once he was done I checked the motor again and it was hot but not excessively. It was on the verge of where you can just barely hold your hand on the motor, which I think is about ~70C and that's perfectly acceptable.
Later I also tried putting a rubber coupling on the roller to increase its diameter to increase the top speed but instead the motor started struggling and the top speed decreased but I think this might have also been the battery running flat. Previously I said the car battery I used was 32Ah but I looked at it and it's actually 54Ah. But for a 54Ah battery it's pretty weak so it might be on its way out.
I think the next upgrade to this scooter would be a lithium battery, but the frame is old and tired and the wheels are wobbly so there wouldn't be much point upgrading what is honestly just a toy. But a very fun toy at least.
And that's it for now, thanks for visiting my blog.


Komentarai
Rašyti komentarą